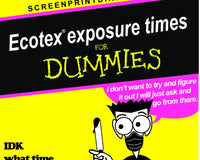
We’re so excited to share today, an affordable, DIY print project that will help you tackle one of the most common challenges: emulsion exposure time.
We know how frustrating it can be if you are new to screen printing and do not have the proper equipment.
So, we came up with an affordable and easy-to-build exposure unit for screen printing that will help you get consistent exposure times and well-exposed screens.
How to Build A Screen Printing Exposure Unit:
Things You Need:
- 500w flood lamp (check your local hardware store, shouldn't be more than $20)
- 2 x 4 - 24 inches wood (QTY: 2) *pine wood is the easiest to work with
- 2 x 4 - 20 inches wood (QTY: 1)
- 2 x 4 - 18 inches wood (QTY: 1)
- 2 x 4 - 10 inches wood (QTY: 1)
- 2 1/2 inch general purpose screws (QTY: 11)
- Piece of glass or plexiglass as large as your artwork to keep artwork pressed down against the screen
Tools You Need:
- Table or hand saw (home depot will cut them for free if you don't own a saw)
- Power drill
- Measuring Tape
Video Reference - How to Construct
Making an Exposure Unit Under $20
This DIY exposure lamp will keep your bank accounts happy and keep you from those constant headaches from that repeated trial and error.
This DIY exposure lamp will keep your bank accounts happy and keep you from getting those constant headaches from repeated trial and error.
Let's Talk
Remember, we are here to help! Drop a comment below or email our support team at info@screenprintdirect.com


1 comment
Michael Jefferson
Hi im just getting started in the screen printing world and have a few questions. im using AP blue eco emulsion and have 500w flood lamp how long would you recommend burning for because I cant seem to get the timing right. I also got the blue tex emulsion and would I burn them the same way?