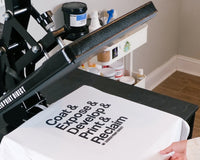
Quality prints start with a fresh screen. What do we mean when we say fresh screen? We don’t mean you need a new screen every time you go to print! You can achieve squeaky clean screens using our line of chemistry to reclaim your screens back to brand new.
Below we will walk through the steps of the reclaiming process and the products you can use to safely remove inks, emulsions, oils, and other residues. In case you haven’t heard the term “reclaim” before, reclaiming is the process of removing the stencil from the mesh and restoring the screen to its original condition for reuse.
- Remove excess ink from your screen
Our favorite way to remove excess ink is with an ink scraper, this cheap little plastic tool is very versatile and handy tool in the print shop. Using an ink scraper scrap the excess ink off the screen and back into the ink’s container. Using this method to remove your ink you are saving ink (and money) for future use!
- Rinse off remaining ink with an ink cleaner
Take your screen to the washout booth or a sink with a filtration system. * Next wet down your screen and spray the front and back with Plastisol Screen Wash or Water Based Press Wash (depending on the type of ink you are using) Once you have sprayed it down use a nonabrasive scrub pad or brush to scrub both sides of the screen until the ink residue is gone. Rinse both sides and let the screen dry.
*Filtration system: Each county regulation differs on what is allowed down your drain. Please check your local county rules before putting chemicals down the drain in your home or work space.
- Remove your emulsion stencil from the screen
Emulsion remover is very simple to use, however we have seen this step go very wrong for some people! It is important to note that emulsion remover cannot sit on the screen too long before you wash it off or it will cause the opposite effect. If emulsion is on the screen too long, it will lock the emulsion on the screen and the emulsion will not wash out.
With that said, spray emulsion to both sides of the screen. Let the emulsion sit for approx. 15-20 seconds and then rub a nonabrasive brush or scrub pad over the front and back of the screen. After this, use a high-pressure washer to wash the emulsion out of the screen, we recommend washing from the bottom and working upward.
Another important note: A high pressure washer is required to rinse out the emulsion. A hose will simply not work.
- Apply a hazer remover and/or degreaser to your screen.
This isn’t a step always required but we recommend it to ensure the removal of oil and residues. Sometimes after you rinse off your emulsion you will find a “ghost image” left by the previous print left in your mesh. This step will help eliminate this ghost image.
There are several different products you can use for this step. Screen Print Direct manufacturers Hyper Haze, Liquid Haze, and Mesh Degreaser. We will break down the differences below before instructing how to use them.
- Hyper Haze is a three in one product that dehazes, degreases and eliminates ghost images on your screen. This product is a paste like texture. It is safe for all mesh and ink types.
- Liquid Haze does everything Hyper Haze can do but is in liquid form. The different textures were made to suit printer preference. Some find the liquid easier to use as it can squirt onto the screen.
- Mesh Degreaser is as simple as it sounds. This product degreases your screen eliminating oils and residues that can be left behind and cause issues in your next print. It is safe for all mesh and ink types.
To use these products in your reclaiming process you need to apply the product to both sides of the screen and then gently scrub with a nonabrasive brush or sponge and rinse.
- Dry your screen!
Before starting a new print, your screen must be completely dry, any water can affect your next coat of emulsion.
Following these steps will help ensure that the screen is fully cleaned and ready for reuse in future printing projects.


