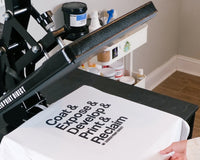
When it comes to screen printing equipment there are a lot of cost-efficient alternatives to expensive equipment. The DIY screen printing movement has gained a lot of momentum recently and while using a flash dryer isn’t exactly “DIY” I think it’s safe to say it is a common tool used by this type of resourceful thrifty printer. Today we dive into the benefits of the flash dryer and how to properly use one for your first graphic print.
Why use a flash dryer to cure ink?
Screen Printing equipment can be expensive! Print shops use conveyor dryers which are a lot of dough, a typically entry level unit starts at $1,400. If you are just starting to screen print this is a big investment. Thankfully there is a more affordable option and one that takes up a little less room in your shop/garage. The flash dryer! Flash dryers are less expensive, take up less space on the floor and effectively get the job done.
Flash dryers are typically used to, you guessed it…flash dry ink. In case you didn’t know what this means, it is a procedure in screen printing when you print a base layer of ink and then flash the base with heat to slightly gel the ink before printing a new color on top of the ink.
The flash dryer is versatile in that it can also be used to cure your ink completely if the heat settings are correctly applied for the right amount of time.
Before jumping into how to use the flash dryer it is important to understand how plastisol ink works and why it needs to be cured.
How plastisol ink works?
Once you place your ink onto the screen, it sits there until applied to the garment/substrate using a squeegee to pass ink through the mesh. The ink is then bonded and solidified with heat (for example with a flash drier.) It's crucial to remember that these ties are permanent once the heat is applied, and the ink will not wash out. While it is permanent with heat it is important to note that without heat the plastisol ink is not bonded to the substrate and will simply wash off. Once plastisol ink is bonded with heat it cannot be separated from its substrate. There are special chemicals that will help with mis prints and spot removal of ink however they are harsh and typically hazardous, and you must be delicate when removing it.
Curing plastisol ink with a flash dryer
The time required for the ink on your screen to cure is dependent on manufacturer requirements. Manufacturers will give a cure temperature and time for the ink to cure. Typically plastisol ink must be cured for a least one minute. When using a flash dryer this means the ink must be under the flash dryer for at least one minute to cure properly.
Next let’s look at temperature. Curing temperatures for plastisol ink vary. Low temperature cure inks cure at 270° Fahrenheit while standard plastisol inks cure at 320° Fahrenheit. Because low temperature cure inks cure at a lower temperature they are more desirable to use specifically when using a flash dryer. Why? The flash dryer doesn’t have to heat up all the way to 320° Fahrenheit and heating up the flash dryer can take a bit of time. When using a flash dryer, it is important to note that there is distance between the flash dryer and the substrate. Because the flash dryer is not touching the garment directly the temperature of the flash dryer does need to be slightly higher than the recommended curing temperature from the manufacturer. For example, if the ink cures at 270° Fahrenheit we recommend heating the flash dryer up to 290° Fahrenheit. If your flash dryer does not have a temperature setting than the recommendation of a laser temp gun below is a requirement.
It is important that the plastisol ink reaches 270° Fahrenheit or the ink will not cure, and it will wash out. How can you ensure your ink is reaching the correct temperature? We highly recommend using a laser temperature gun especially when working with a flash dryer. The laser temperature guns are very easy to use and ensure perfect curing every time. Simply turn on the gun and point it at the plastisol ink on the garment. Check the temperature frequently throughout the minute to ensure the ink cures for a full minute at this temperature. Once you dial in these heat settings you won’t need to check the temp on every print.
Always test your print
Before starting a large print run or job we always recommend running a few tests on the substrate to ensure the ink is cured properly. There are two different tests you can perform.
Stretch Test for Screen Printing: Take your printed garment and pull on the print area. If the ink begins to crack than the ink is under-cured, if the ink doesn’t crack then the ink is cured.
Wash Test for Screen Printing: This one is straight to the point. Take your garment and wash it in the washer. Does the ink come off the garment or has it bonded properly?
As always if you have any questions or comments don’t hesitate to reach out to us! We love to help.
Happy printing 😊


