Vintage and retro clothing is making a comeback in a big way! This comeback isn’t just prevalent in secondhand clothing but in graphic print t-shirts and other merchandise as well. Time to add this distressed t-shirt style of printing to your arsenal and offer customers something new.
The concept may seem somewhat ironic to printers, we typically don’t want the ink to look cracked or like it is fading. Generally, we like smooth opaque ink that doesn’t fade and has been cured properly. While we can’t control what the people want, we sure can create it for them.
What is a Retro Print?

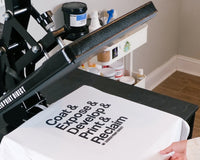
Above is a great example of a vintage print. The ink looks a bit worn out and like it has real texture to it. The print and t-shirt itself usually appears like it has been through the washer one too many times. The vintage look adds a level of deeper value, as if this item has been kept and re-worn for many years instead of tossed.
Today we will dissect the screen-printing process of creating a vintage graphic t-shirt. Let’s dive into making a new t-shirt look old (minus the armpit stains.)
Artwork
The first step when creating a distressed print is through the artwork. This is the easiest way to create a vintage look. When in the design process we suggest layering textures over the design. Consider the look you are trying to accomplish. There are so many textures that can differentiate the vintage feel you or your customer are wanting to see. You can make your prints look like broken cracked glass, a rusty piece of metal, or give it a ’90s grunge texture and so much more! This is the fun creative part of the process, explore the world of textures and sit back as your mind explores all the fun printing opportunities.
Now let’s jump into the technical nitty-gritty stuff. Here we will break down how to use these textures in an editing program to get your image ready to print.
If you are a noob (new to screen printing or photoshop/photo editing software):
First, download the file of distressed look you want to layer. Make sure it has no background or if it does do your best at erasing it.
In photoshop: Use your magic wand or standard eraser tool. If you are feeling confident when doing this, you can alternatively try using the background eraser tool and play around with different “limits” and “tolerance” to get the right amount of background removed. The last option for photoshop would be going to the top menu and clicking “select” then choosing a color range, this tool will help you find the color ranges in the images.
If you know photoshop like a pro:
In illustrator: Place the texture in and do an image trace on the file. You may need to play with the “threshold” “paths” “corners” “noise” etc. to get your desired look.
Once the artwork is complete, place the file layer over your artwork. If you are new to photoshop and editing programs, you can make the distress the same color as your background to get the distress look.
If you think highly of yourself then go ahead and place it over your artwork. Select everything together and go to your pathfinder tool and click trim. Once you do that select the distress and hit delete. This will leave cut out your artwork where the distressed design was to give it a nice, eroded look.
T-Shirt Selection
The type of t-shirt selected for the print is going to really bring the print to life. Since we are trying to accomplish a distressed t-shirt typically shirts that are lighter weight give a vintage look. The lightweight creates an illusion that the shirt has been worn down. If you are purchasing shirts online without seeing them first we recommend looking for a shirt under 4.5oz weight.
You can also purchase “vintage” washed t-shirts from many t-shirt wholesalers. This is an excellent option however we do encourage you to have your print finalized before purchasing the t-shirts. The distressed artwork and the vintage-washed t-shirt might be a little overkill depending on the artwork or the amount of distress on the vintage-washed tee.
Printing on the Press
There are two different techniques we recommend when printing to create a vintage distressed look. You can print with very light pressure so that you don’t get a lot of ink transfer. Alternatively, you can print like normal but only pass the ink once; by only passing the ink once you won’t achieve the coverage you typically get with a print flash print technique.
Ink Selection
You can use either plastisol or water-based ink to create a distressed vintage t shirt. However in our experience we find that discharged water-based inks give a better effect. When water-based ink is discharged and printed onto the garment the ink color enters into the fibers of the garment instead of laying on top of the fabric. When ink is embedded into the fabric the garment has a soft hand feel, its soft like favorite band t shirt after 100 washes. Curious about the environmental impact of your screen printing inks? Check out this article.
XX
We hope this blog post gives you confidence in creating your first vintage print. We would love to see your artwork and prints, please make sure to tag us or comment on your print below. If you need further assistance with any part of the printing process, we are more than happy to help you.
Also, we are sure there are other tips out there for creating a vintage feel, we would love to hear any further tips or advice you can give to printers who are trying to achieve this look.


