Supplies you need to start screen printing today:
Today we dive into one of the most frequently asked questions in our DM’s and email.
“I want to start screen printing, what do I need to start?”
We have a full step by step “How To Screen Print” guide coming soon, however, we thought we would take some time and create a laundry list of materials you need to get started screen printing today.
Disclaimer: There are numerous ways you can start screen printing; we have seen it all! There are some very crafty people on the internet and Pinterest that have a black hole of DIY printing options. However, in this blog, we are going to cover a list of supplies that you need for the most traditional form of screen printing.
Silk-Screening Printing Supplies
When beginning to formulate your list of supplies, you must first decide what type of object you want to print on. Are you printing strictly textiles (t-shirts, canvas bags) or are you printing posters and/or wood objects? Do you want to print both? The medium you want to print on will dictate the type of ink you must use.
-
Ink – Required.
- Plastisol Ink – For Textiles. We recommend our Rapid Cure line. It cures at 270 and can be printed on a wide variety of materials including poly blends.
- Water-Based Ink – For Textile and Poster. We recommend any of our Ecotex® Water Based Screen Printing Inks. If you are just printing textile, then we recommend using plastisol ink because it is easier to work with.
- To dive a little deeper into the differences of these two inks check out our blog “Plastisol vs Water-Based Inks”
- Emulsion – Required. This is a light sensitive liquid chemical used to create your stencil. The type of emulsion you need is dependent on the type of ink you are printing with. If you are just beginning to print and strictly using plastisol inks, we recommend our Ecotex® TEX Red Screen Printing Emulsion. If you are printing with water-based inks we recommend our Ecotex® PWR Screen Printing Emulsion which is a great emulsion for printing plastisol and water-based inks.
- Emulsion Remover – Required. This is a must-have item if you plan on reusing your screen. When you are done printing your artwork and want to print new artwork with the same screen you must remove the old emulsion to create a new stencil. Ecotex® Screen Printing Emulsion Remover will reclaim any emulsion off any screen.
- Ink Cleaner – Required. This is another item that is required if you plan on reusing your screen for another print or if you want to change the ink color on your artwork. The type of cleaner you need is dependent on the type of ink you are printing with. If printing with plastisol we recommend Ecotex® Plastisol Press Wash. If you are printing with water-based ink we recommend Ecotex® Water-Based Press Wash. Both cleaners will break down the ink and make clean up a breeze. Please note you can not remove plastisol ink with water, it will not come off and will make a mess on your mesh.
- Platen Tack – Highly Recommended. An adhesive is an important supply to have when printing because it keeps the object you are printing in the correct position, there will be no movement of the object when it comes time to print. We recommend using an eco-friendly water-based adhesive. Ecotex® Super Tack Pallet Adhesive is a water-based adhesive that is easy to use and doesn’t leave sticky residue on your garment.
Screen Printing Equipment
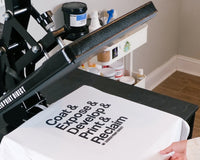
- Single Color Screen Printing Press or “something equivalent” – Required. The most traditional form of screen printing is going to be done on a single-color press. If you are printing on a budget, we suggest starting with hinge clamps and a screen printing screen.
A. Mesh Screen - Required. Whether you are using a single-color press or hinge clamps you are going to need a mesh screen to create your stencil on. We recommend a 137-mesh screen for beginners printing with plastisol ink. This is a great size for beginners because it allows you to get a good amount of ink through the screen. If you are printing with water- based ink a 155-mesh count is recommended.
- Exposure Unit or Light Source – Required. This is necessary for exposing your emulsion. You can purchase an exposure unit however these can cost $1k+ and we don’t recommend a full unit for a beginner. Instead, we recommend a few DIY options that are budget friendly. Please visit our blog post “DIY Screen Printing Exposure Unit”.
- Screen Printing Squeegee – Required. This small but mighty tool is going to be used to push or pull the ink through your mesh. We recommend a 70-durometer squeegee. A 70-durometer gives you just the right amount of stiffness on the rubber blade. Our clear blade wooden handle squeegees are 70 durometers and feel great in your hand when printing.
- Heat Gun or Conveyor Dryer – Required. You will need a tool to cure your ink. There are a lot of options beyond a heat gun or conveyor dryer but we find these the easiest to work with for beginners. Heat presses tend to scorch garments if too hot or under cure ink if not heated properly. Conveyor dryers, while easy to use are very expensive so ultimately, we recommend a heat gun for screen printing! These tools are super simple to use and get your ink to the right temp. You can buy them at Home Depot, Lowes, Harbor Freight etc.
Highly Recommended Supplies
- Laser Temperature Gun – Recommended. This tool will help you check the temperature of the ink while the ink is curing. If using a heat gun you can easily check the temp of the ink to ensure it hits the right cure temp for at least one minute.
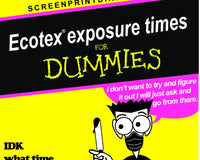
- Exposure Calculator – Recommended. An extremely beneficial tool that makes exposing emulsion much easier. This calculator will help you narrow down your exposure time, so you don’t have to guess, very useful when beginning to screen print. Trial and error can get expensive. This little tool eliminates a lot of guesswork.
- Scoop Coater – Recommended. A tool used to evenly spread emulsion onto your mesh screen. Scoop coaters are designed perfectly for this task and allow you to spread emulsion easily without mess. Why do we recommend this method over a popsicle stick? A popsicle stick often leads to a very uneven layer of emulsion on the screen. When emulsion is uneven you risk running into issues in the exposure process.
- Ink Spatula –Recommended. A tool that is used to mix and scoop ink from the container. We highly recommend a dedicated tool for this activity. Yes, a spoon from your kitchen could do the trick but I promise you won’t regret using a spatula instead.
- Scrub Pad – Recommended. An abrasive sponge that allows you to deep clean your screen and gets it looking as good as new for your next print job.
- Screen Tape - Recommended. Screen printing tape that is used to cover open areas of your screen that you do not want ink to pass through. I.e. registration marks and pinholes.
There are many other tools that can help you in the printing process, however, the list above will help you get your feet wet without breaking the bank.
Let's Talk
Remember, we are here to help! Drop a comment below or email our support team at info@screenprintdirect.com


