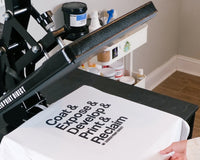
Printing with multiple colors can be one of the trickiest parts of screen printing. From artwork prep to aligning screens on press, there are plenty of variables that can throw you off track. But don’t worry—we’ve gathered our best tips to help you tackle multi-color jobs with confidence (and without the gray hairs).
Don't love to read? Watch this!
Let’s start at the beginning: your artwork.
Step 1: Preparing Your Artwork
Color Separation
Color separation software is a powerful tool for breaking down full-color artwork. You upload your image, and the program separates it into layers for each color—making complex designs easier to manage.
A full-color image uses CMYK (cyan, magenta, yellow, and black) to create all the shades you see. For this type of artwork, specialized software is typically required.
On the other hand, spot color artwork—where colors are solid and not blended—can sometimes be set up without dedicated software, as long as the file is prepared correctly for screen printing.
💡 Pro Tip: Color separation software isn’t cheap. Before investing, consider how often you print complex full-color designs. If it’s not frequent, you can stick with vector graphic tools or keep projects to spot color prints until the investment makes sense.
Step 2: Exposing Your Screens
Once your artwork is ready, placement is everything. Consistency here will save you endless frustration during registration on press.
Here are three ways to make sure your artwork lands in the same spot every time:
-
Platen Marks – Use marks on your platen to center artwork. It’s helpful, though not always perfect. (Check out our blog How to Align Your Shirt on the Platen for more details.)
-
T-Square – A simple T-Square ruler lets you align artwork quickly and more accurately. Available for purchase here.
-
Registration Template – Think of this like oversized graph paper. It allows you to line up artwork with precision so each exposure matches perfectly. (You can grab our registration template here.)

(Pictured Above - T Square Tool)
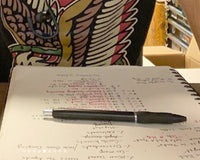
Step 3: Test, Test, Test!
Never skip this step. Test prints are the best way to catch problems before they ruin your production run.
Testing allows you to:
-
Confirm screen alignment
-
Check ink coverage and curing temperature
-
Troubleshoot before using valuable garments
Use old shirts or test pellons (available here). A few minutes here will save you hours of frustration later.
Step 4: Printing Techniques
Now for the fun part: actually printing. There are two main approaches, and the right one depends on your garment and ink.
Print-Flash-Print
-
How it works: Print the first layer, semi-cure it under a flash dryer, then print the next color.
-
When to use: Best for dark garments, since flashing improves opacity and prevents ink from sticking to the next screen.
Wet-on-Wet
-
How it works: Print each color directly without flashing in between, usually from light inks to dark inks.
-
When to use: Works best on light garments where opacity isn’t as challenging. This technique speeds things up but keep in mind the ink stays wet, so misprints can happen if anything touches it.
Final Thoughts
Multi-color printing can feel overwhelming, but with the right prep, tools, and technique, it becomes much more manageable. Remember: preparation and testing are your best friends.
And if you ever get stuck, we’re here to help. Drop a comment below or reach out to our team at info@screenprintdirect.com - we love helping printers level up their craft.